Section author: Robert Nikutta <robert.nikutta@noirlab.edu>
Version: 20211119
1.9. Jupyter Notebooks & JupyterLab
1.9.1. Preface I: JupyterLab vs Jupyter Notebook “Classic”
In October 2020 Data Lab switched to JupyterLab as its default notebook interface. This page refers to JupyterLab.
The “classic” Jupyter Notebook interface is still available. This page describes how the user can switch to and use the classic interface:
1.9.2. Preface II: Python 3 vs Python 2
With the switch to JupyterLab, support for Python-2 notebooks has ended at Data Lab. While all current notebooks curated by Astro Data Lab use Python 3, some users may still work with older Python-2 versions. This page
provides guidance for updating these older notebooks, and we are happy to assist users individually if needed. Please contact the team: datalab@noirlab.edu
1.9.3. Introduction
A very convenient way to do data science is interactively in your browser, for instance through Jupyter notebooks.
Jupyter notebooks are self-contained programs (for Data Lab they are written in Python), which can be loaded and run right inside your browser. This is very convenient, as you can use the entire power of Data Lab and of the Python language without giving much thought to the installation and configuration of software.
You can recognize Python notebooks by their file name suffix
.ipynb, i.e. my_first_notebook.ipynb. This file stores all the
input commands that you use in the notebook, as well as the output that
these commands generate (for instance, tables and graphs).
Data Lab was built from the start with Python notebooks in mind, and provides a notebook server for registered users.
1.9.4. Using Data Lab through a notebook
There are two ways of using Data Lab through a Jupyter notebook:
Data Lab’s registered users notebook server
Need a user account registration
Saved notebooks will persist as long as you want to keep them
Access to all database holdings at Data Lab
Your account comes with a generous allocation of virtual storage space (~1 TB). You can use it to store query results, upload/download files to/from, share files with collaborators, perform deeper analysis on data, etc.
The account also comes with ~250 GB of dedicated database space to hold any tables you want, either uploaded by you, or as the results of your SQL queries against Data Lab datasets
Run a notebook server on your own computer
You need to install the Data Lab client and interfaces on your computer
1.9.5. Launch a notebook server
Launch either the Data Lab notebook server, or run notebooks locally and connect to Data Lab:
Data Lab’s notebook server (with JupyterLab) for registered users: https://datalab.noirlab.edu/devbooks
Launch JupyterLab on your own computer: type
Jupyter notebookin a terminal; a browser window pops up
Data Lab’s notebook server will prompt you for your registered user name and password.
If you don’t have a Data Lab account yet, you can register for one right away.
You should see the default JupyterLab interface, with a side-bar on the left, and a collection of launcher icons on the right:
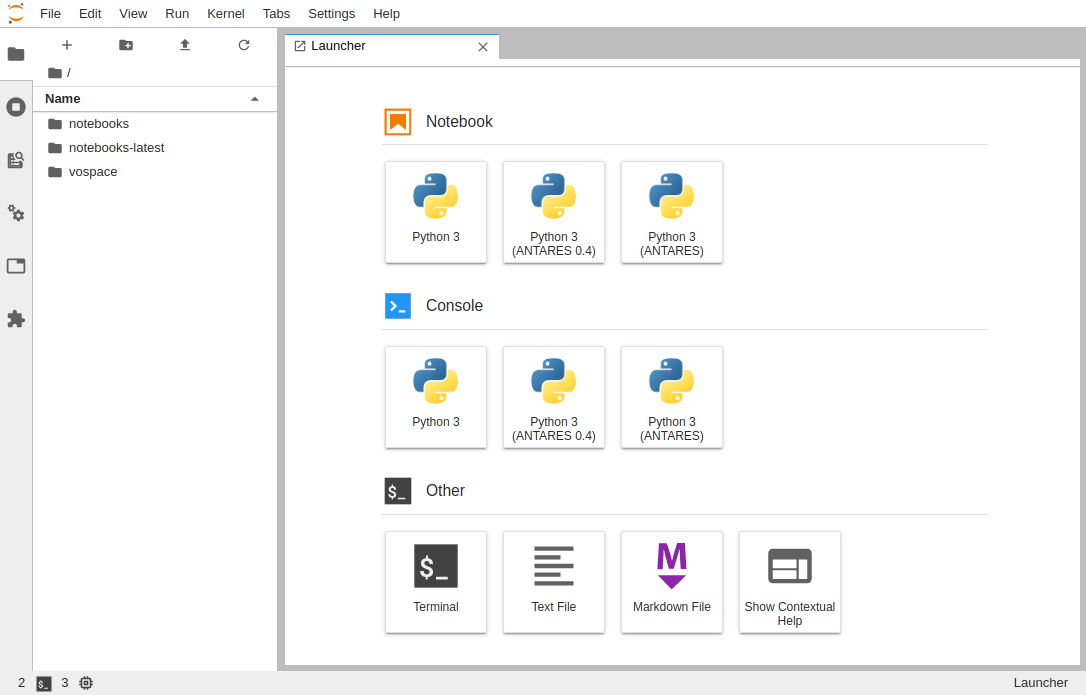
With a fresh account, you will see in the left-hand side bar three directories. Two of them are pre-populated with example notebooks, ranging from simple “getting started” notebooks, through more technical “how to” notebooks, to “science example notebooks” that guide you from a science questions, through writing data queries, to data analysis and visualization.
The
notebooks-latest/directory is read-only, and contains the default set of notebooks curated by the Data Lab team, as of right now. You can get a fresh copy of them easily.The
notebooks/directory has the default set notebooks, as they were when you first created your account. This directory is read & write.The
vospace/directory is a read-only link to your Virtual Storage directory
You can load any of the notebooks by navigating through the directories and clicking on its name, or create a new notebook to start with a clean slate. You can also organize your notebooks into new sub-directories.
1.9.6. Terminal
The JupyterLab environment comes with a terminal emulator built-in. It is somewhat limited in the commands that it will let you execute, but is very useful in many cases. To bring up the terminal, click on the “Terminal” launch icon:

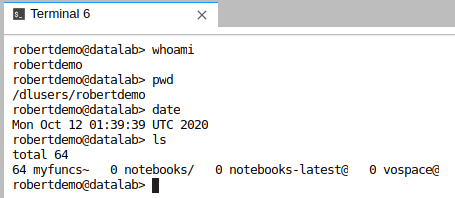
A new tab will open in JupyterLab with the terminal ready for your commands:
1.9.7. Get the latest set of default notebooks
You can use the terminal to get the newest versions of all default
notebooks (which may have changed since your notebooks/ directory
was first created.
A built-in shell function getlatest does the work. To get the
latest default notebooks, simply type
username@datalab>getlatest
Copied /dlusers/username/notebooks-latest/ to notebooks_20180710_014021/
This copies the content of notebooks-latest/ to a new directory
named with the current date and time.
You can also provide an explicit target directory name:
username@datalab>getlatest mydir
Copied /dlusers/username/notebooks-latest/ to mydir/
The target directory will be created if it doesn’t exist yet. Otherwise, for every file that is already present in the target directory, you will be asked whether you wish to overwrite it.
1.9.8. Basic notebook usage
1.9.8.1. Keyboard shortcut cheat sheet
Many of the notebook functions can be accessed through convenient
keyboard shortcuts. These are available when a notebook is loaded
and/or edited (see below). Most shortcuts are invoked by pressing the
ESC key (release it after pressing), which enters the command
mode of the notebook, followed by one or two additional keys, which
are pressed simultaneously or in sequence (releasing the previous key
before pressing the next one), depending on the function you wish to
invoke.
A list of most default keyboard shortcuts can be for instance found here:
https://blog.ja-ke.tech/assets/jupyterlab-shortcuts/Shortcuts.pdf
The Accel key referred to in this cheat sheet is usually Ctrl
on Windows and Linux machines, and Cmd on MacOS.
Note that JupyterLab also allows you to define you own shortcuts for commands that you often use.
1.9.8.2. Load an existing notebook
To open an existing notebook, simply find it in the left hand sidebar (click through the directory tree), and double-click on it. It will open in a new tab:
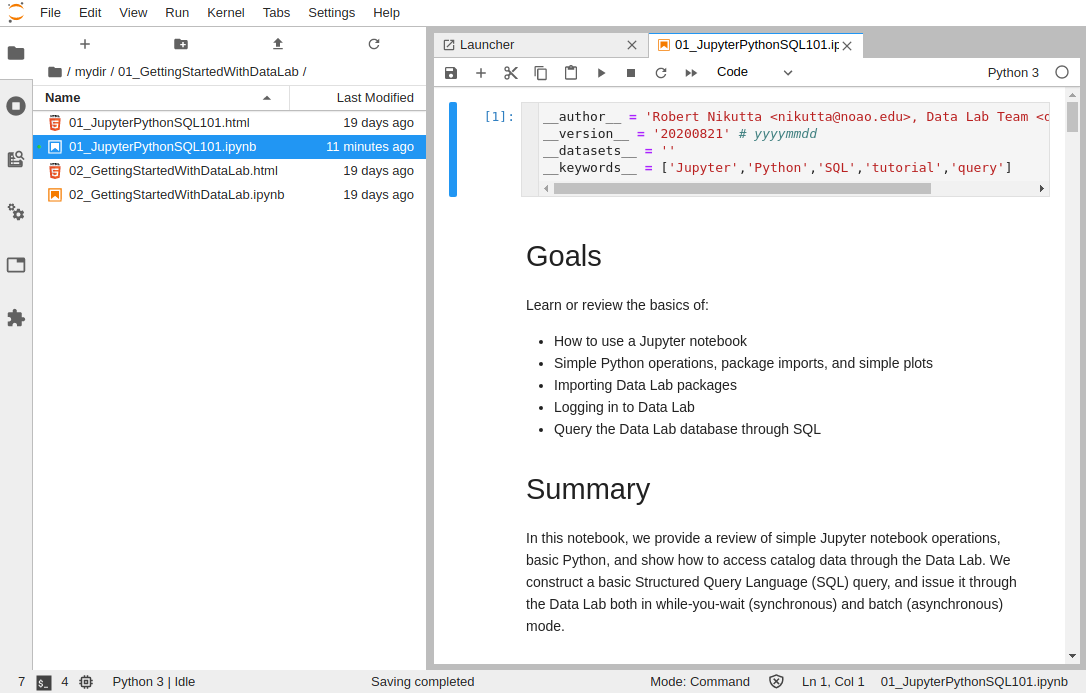
You cannot access .ipynb files that are outside (i.e. above) the
root of the directory tree in the dashboard. You can always jump back
by clicking on the “root directory” icon above the file browser (in
the left side bar):

Upon opening a notebook file, the lower left of the window will
display status notifications, including (briefly) No Kernel |
Initializing. Once the notebook is loaded, the message will change to
the name of the kernel, and a status message:

In the example above, the kernel is Python 3, and the Idle
message means that the notebook is ready for commands.
1.9.8.3. Create a new notebook
To create a new notebook, click in the Launcher tab on the “Python 3” icon under “Notebook”:
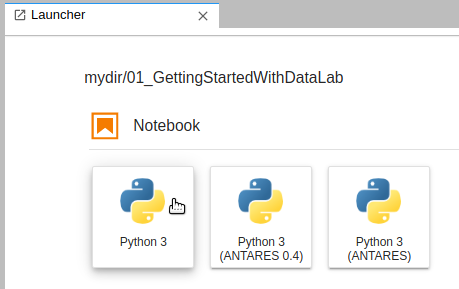
A new browser tab will open with an empty notebook (named Untitled.ipynb) awaiting your input:

1.9.8.4. Set notebook title (and .ipynb file name)
When you create a new notebook, it’s title will be Untitled
(possibly with an auto-incrementing counter appended to it,
e.g. Untitled3, etc.).
The title of a notebook also serves as the root of the notebook file name to be saved. It is a good idea to give the notebook a descriptive title, e.g. one that helps you recognize later what this notebook was all about.
To change the notebook title, right-click on the current title (which in our example is “Untitled.ipynb”), and select “Rename Notebook…” from the pop-up menu:
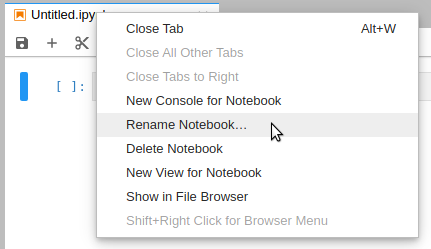
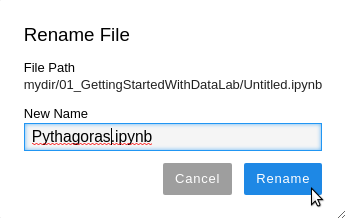
You can now edit the highlighted text (here Untitled), then click on the Rename button to confirm your change
1.9.8.5. Edit and run a cell
Commands and text are entered into so-called cells inside a notebook.
Each cell can contain one or more (or many!) lines of input. The
content of the cell will be only executed when you explicit tell it to
do so (via keyboard shortcut Shift+ENTER).

In the example above we have instructed the notebook to import the
Data Lab authentication client, under a shortcut name ac. Once the
input was typed in the cell, a Shift+Enter (pressed
simultaneously) executed the content of the cell. The import was
performed, and a new empty cell appeared beneath the first cell,
awaiting new input.
When the execution of a cell does not return immediately, the cell number at the left changes temporarily to [*] during processing - during a long task this might be your only evidence that something is happening.
1.9.8.6. Set cell type
Each cell can be set to one of several input modes (e.g. Code,
Markdown, etc.). The
default is Code (meaning valid Python commands). In the example
below we switch to Markdown which is good for formatting, headers,
descriptive text, etc.

You can also use keyboard shortcuts to switch the cell type; e.g., to
change a cell type to markdown, press ESC,m. To change it to code,
type ESC,y.
After changing the cell type to Markdown we enter a large title
(H1 size):

Finally, a Shift+ENTER keyboard shortcut executes this cell as
well, rendering the markdown content:

As before, a new empty cell is created right underneath the rendered one.
1.9.8.7. Run the entire notebook
To run all cells in a notebook, one after another, starting at the
top, click on the Cell entry in the menu bar, then on Run all,
as shown below:
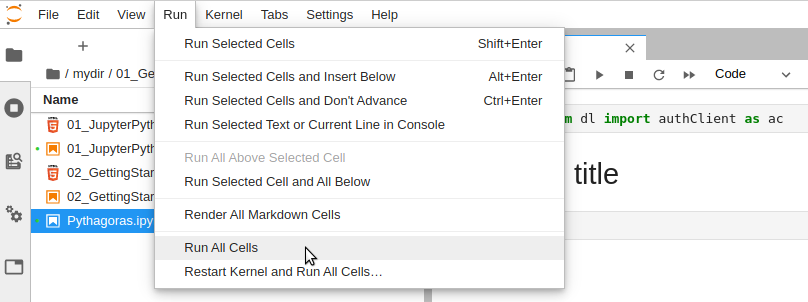
The entire notebook will be executed.
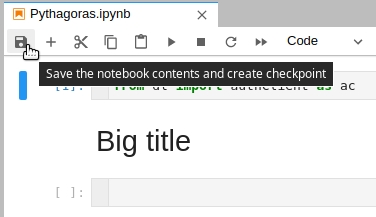
1.9.8.8. Save and export
Your notebook is automatically saved after a set period of time
(typically 120 seconds). If you wish to save the file manually at any
given time, either type Ctrl-s, or select from the menu File -->
Save Notebook, or click on the “Save the notebooks content and create
checkpoint” icon as shown below:
A notebook .ipynb file also saves all output generated by the
notebook cells. This makes a notebook very portable, and you can
easily share it with others, email it to yourself, etc.
You can export the notebook to various different formats, for instance
HTML or PDF. To do so, select from the Menu File --> Export Notebook
As... and then the appropriate option.
1.9.9. Logout from the notebook server
To logout from any of the Data Lab notebook server, select from the
Menu File --> Log Out.
1.9.10. Troubleshooting
1.9.10.1. Restart the kernel
Sometimes you may wish to restart a kernel, i.e. restart the Python notebook you are currently running.
One reason for doing so is when you have changed some external .py
file that your notebook is importing. If you try to import that file
again, the new changes won’t be picked up (unless you explicitly
reload that file). Another common reason to restart a running
kernel is when there is some technical hiccup with the notebook; a
restart of the kernel can help resolve the issues.
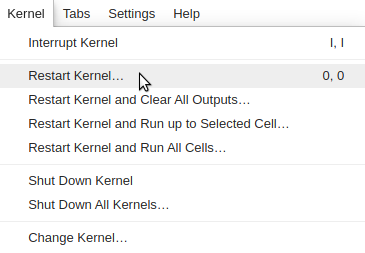
To restart a kernel, either type ESC,0,0 (Escape,zero,zero keys),
or click in the menu bar on Kernel --> Restart Kernel...:
A confirmation dialog will pop up:
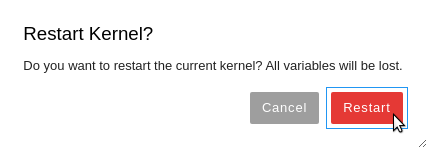
Confirm your wish to indeed restart the notebook kernel by either
clicking on the Restart button, or by hitting the ENTER key.
The kernel will be restarted, and you can re-run all relevant cells in it. (You must re-run the cells, since a kernel restart forgets the current state of memory variables).
1.9.10.2. Restart the notebook server
If you experience technical difficulties in executing your notebook, and you have already tried to remedy them by restarting the kernel (to no effect), then the problem might be on the Data Lab notebook server side.
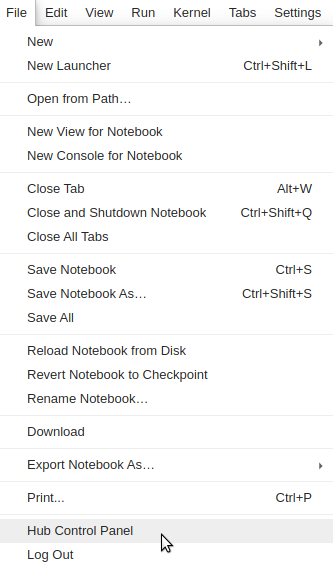
To restart the notebook server, select from the Menu File --> Hub
Control Panel:
You should see two buttons. Click on the red one saying Stop My Server:

Wait a few seconds until the red button disappears. The notebook
server has been shut down, and you can restart it my clicking on the
remaining blue button Start My Server. If you see the following message

click on the blue button Launch Server.
